Ingredientes:
Para el caramelo:
1/2 taza de azúcar blanca 🧂
1/4 de taza de agua 💧
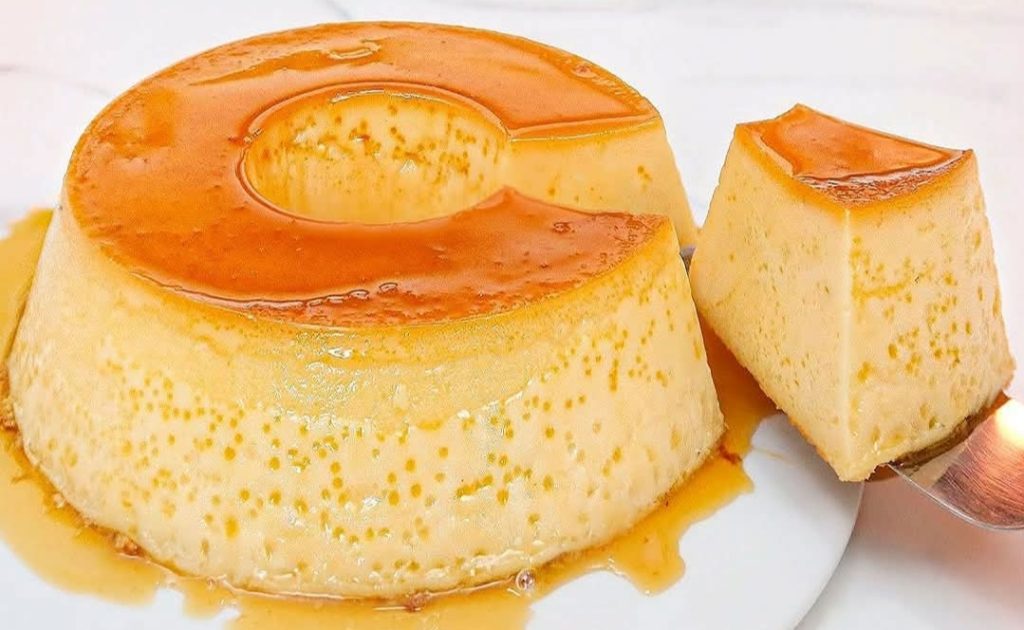
Para el quesillo o flan:
4 huevos 🥚
1 lata o 350 grs. de leche condensada 🥛
395 gr de leche evaporada (la misma cantidad de la lata) 🥛
1 cucharada de vainilla 🍦
Para la torta húmeda de chocolate:
4 huevos 🥚
1 1/2 taza de harina de trigo 🌾
1 taza de cacao o chocolate en polvo 🍫
1 1/2 taza de azúcar 🧂
1/2 taza de leche 🥛
140 grs o 10 cucharadas de mantequilla 🧈
1 cucharadita de bicarbonato 🧪
1 cucharada de polvo de hornear 🥄
1 pizca de sal 🧂
Preparación:
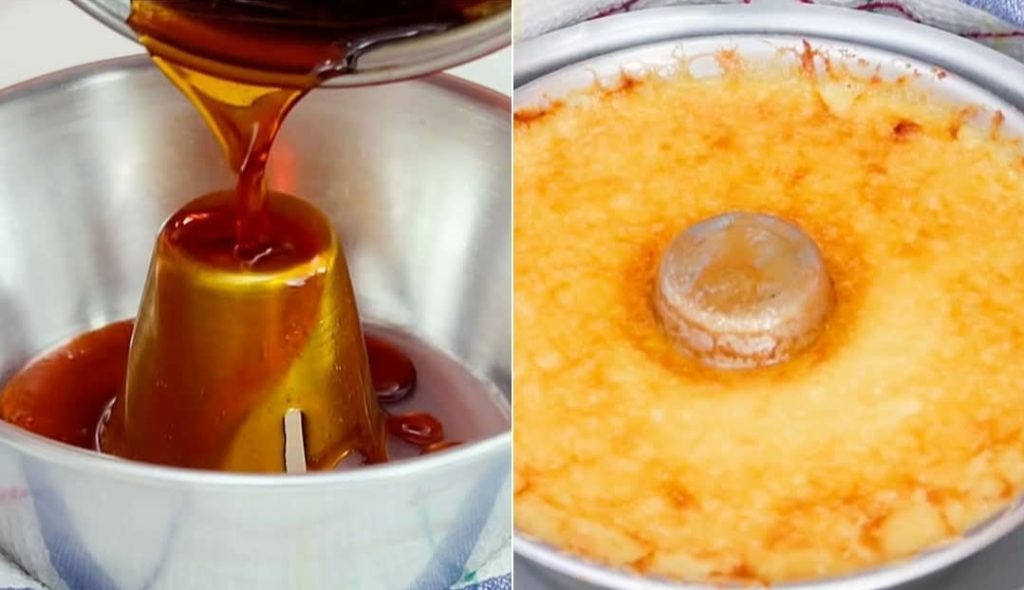
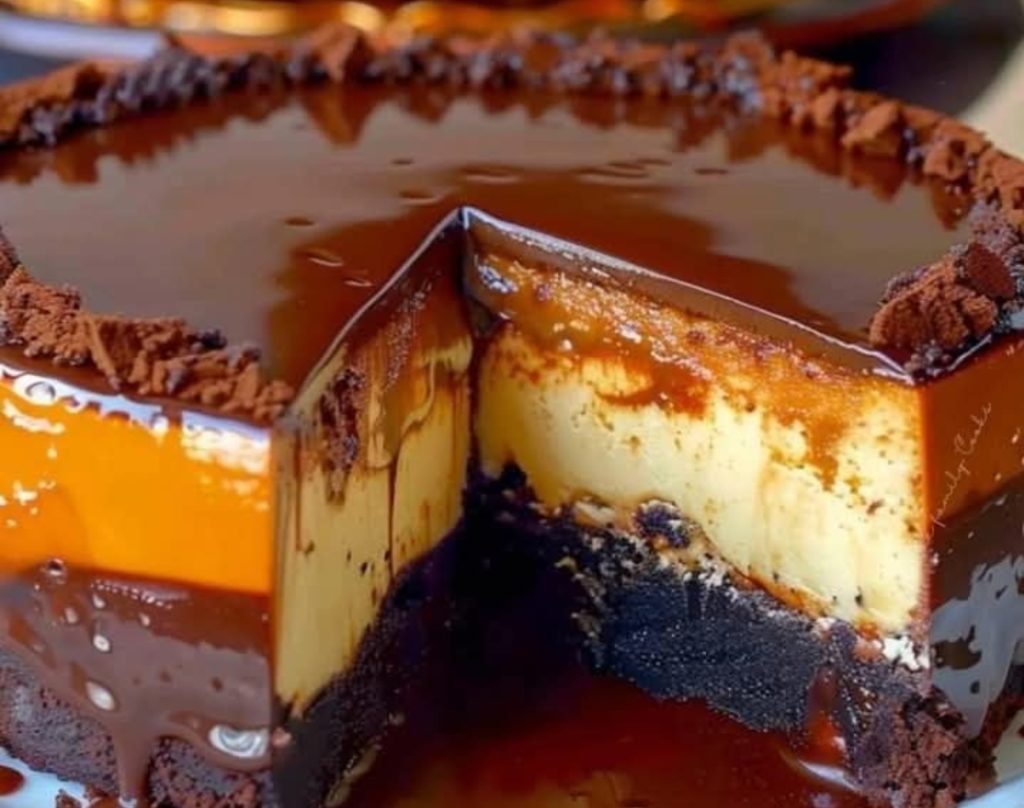
Toma un molde redondo de 20 cm donde hornearás el pastel imposible. Coloca el azúcar con el agua a fuego lento y deja por unos 5 minutos hasta que se disuelva el azúcar 🍮.
Luego de esto, deja cocinar hasta que adquiera un tono dorado y deja enfriar 🍮.
En un bol, coloca los huevos, la leche condensada y evaporada, y la vainilla. Mezcla bien todos los ingredientes hasta que los huevos se integren de manera uniforme y reserva 🍮.
En un bol, coloca la harina de trigo, cacao, bicarbonato, polvo de hornear, la pizca de sal y reserva 🍫.
En otro bol, coloca el azúcar con la mantequilla y bate con ayuda de la batidora a velocidad media alta por aproximadamente 5 minutos o hasta que la mantequilla cambie su color a uno más blanquecino 🧈.
Incorpora uno a uno los huevos mientras vas batiendo a velocidad media, agrega la vainilla y bate por 1 minuto más 🍦.
Luego, con ayuda de una paleta de madera o una espátula, incorpora en dos partes los ingredientes secos de manera envolvente, añadiendo en cada parte la leche, hasta obtener una mezcla homogénea y sin grumos 🍫.
Coloca en el molde que contiene el caramelo ya cristalizado la mezcla del flan o quesillo y luego agrega la mezcla del pastel de chocolate 🍮🍫.
Lleva el molde a un horno en baño de maría a 180ºC por 35 minutos o hasta que al insertar un palito de madera este salga seco 🔥.
Compras recomendadas:
Azúcar blanca de marca reconocida
Huevos frescos de granja local
Leche condensada y evaporada de marcas tradicionales.